
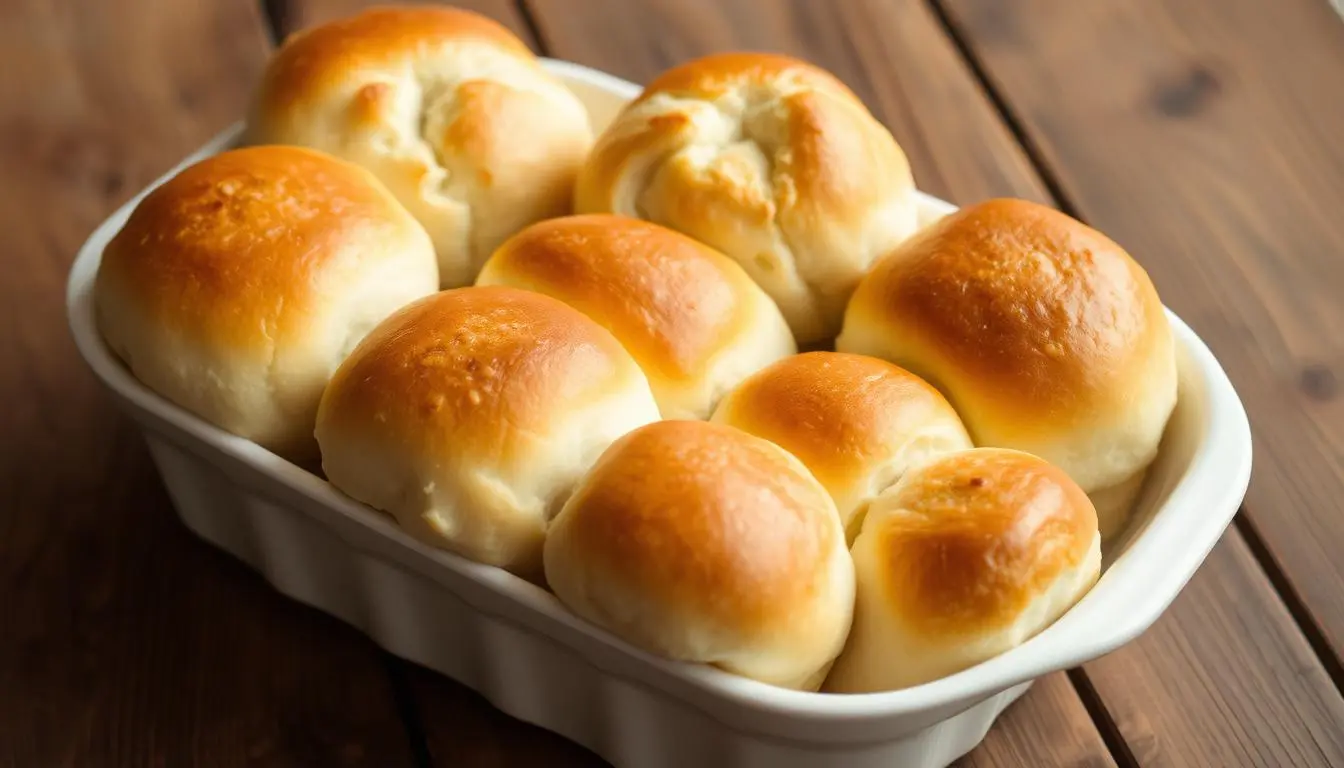
Ever stood in your kitchen, craving warm dinner rolls but dreading the complex yeast-rising process? I’ve been there too. Those days of complicated bread-making are over with these no yeast dinner rolls easy to prepare in just 30 minutes.
Imagine pulling fresh, golden-brown rolls straight from the oven without complicated techniques. This quick bread recipe transforms baking from a daunting task into a simple, enjoyable experience. Baking without yeast means no waiting, no complicated steps—just delicious homemade rolls in under half an hour.
Whether you’re a kitchen novice or a busy home cook, these no yeast dinner rolls will become your new secret weapon. With basic ingredients and minimal preparation, you’ll create restaurant-quality bread that will impress your family and friends.
Table of Contents
Key Takeaways
- No yeast or proofing required for this quick bread recipe
- Total preparation and baking time is just 25-30 minutes
- Perfect for beginner bakers and last-minute meal preparations
- Only 6 basic ingredients needed
- Each roll contains approximately 178 calories
Why Make No Yeast Dinner Rolls: Quick and Simple Solution
Making homemade rolls doesn’t have to be hard or take a lot of time. Easy dinner rolls without yeast are a great choice for busy cooks. They let you enjoy fresh bread with little effort.
Yeast-free rolls are a smart choice for those who want tasty bread fast. They skip the long waits of traditional bread-making. This makes quick homemade rolls a great option for anyone.
Benefits of Yeast-Free Baking
- No proofing or rising time required
- Faster preparation process
- Simplified ingredients list
- Perfect for beginner bakers
Time-Saving Advantages
Yeast-free rolls can change your dinner prep in just 30 minutes. From start to finish, it’s under half an hour. This makes them perfect for when you need a meal fast.
| Preparation Step | Time Required |
|---|---|
| Mixing Ingredients | 5-10 minutes |
| Baking | 20 minutes |
| Total Time | 25-30 minutes |
Perfect for Last-Minute Meals
Got unexpected guests or a sudden dinner plan? Yeast-free rolls are here to save the day. They’re quick to make, so you’ll always have fresh bread ready.
“Simplicity is the ultimate sophistication in cooking” – Kitchen Wisdom
Whether you’re new to baking or an experienced cook, no yeast dinner rolls are a great choice. They’re easy to make and still taste great.
Essential Ingredients for No Yeast Dinner Rolls Easy
Making simple dinner rolls without yeast is easy with just a few pantry items. Start your bread-making journey by knowing the key ingredients for these quick rolls.
The secret to tasty no-yeast rolls is choosing the right ingredients. Each one is important for flavor and texture.
- All-purpose flour: The key ingredient for your rolls
- Baking powder: Your primary leavening agent
- Salt: Enhances overall flavor
- Butter: Brings richness and softness
- Milk: Provides moisture and helps bind ingredients
Baking powder is key in these recipes. It creates tiny air bubbles that help your bread rise quickly, skipping the need for yeast.
| Ingredient | Quantity | Purpose |
|---|---|---|
| All-purpose flour | 2 cups | Structural base of rolls |
| Baking powder | 2 teaspoons | Leavening agent |
| Sugar | 1 tablespoon | Adds subtle sweetness |
| Butter | 2 tablespoons | Provides richness |
| Whole milk | 1/2 cup | Adds moisture |
When making bread without rising, temperature matters. Use room temperature butter and milk for the best results. Fresh baking powder is key for your rolls to rise right.
Pro tip: Always check your baking powder’s expiration date to guarantee maximum rising power!
Kitchen Equipment and Tools Needed
To bake without yeast, you need some basic kitchen tools. These tools make making homemade rolls easy and fun. You probably already have most of these items, so anyone can try this recipe.
Start your baking journey by getting the right tools. The great news is you don’t need special equipment to make homemade rolls.
Basic Baking Essentials
- Large mixing bowl for combining ingredients
- Measuring cups and spoons for precise quantities
- Baking sheet or muffin tin
- Standard kitchen oven
- Wooden spoon or spatula
- Cooling rack
Additional Equipment for Improved Outcomes
These tools are not necessary but can improve your baking without yeast:
- Silicone baking mat: Ensures effortless cleanup
- Pastry brush: Perfect for spreading melted butter
- Kitchen scale: Ensures accurate ingredient measurements
- Parchment paper: Ideal for non-stick baking
| Equipment Type | Essential | Recommended for Best Results |
|---|---|---|
| Mixing Tools | Wooden Spoon | Stand Mixer |
| Measuring | Standard Cups/Spoons | Digital Kitchen Scale |
| Baking Surface | Baking Sheet | Silicone Baking Mat |
With these tools, you’re all set to make delicious homemade rolls. They’ll surely impress your family and friends!
Step-by-Step Mixing Instructions
Making tasty quick bread recipes begins with the right mixing. Your easy dinner rolls need careful mixing of ingredients. It’s important to mix without overworking the dough.
Start by collecting your dry ingredients in a big bowl. Here’s what you should do:
- Measure 2 cups of flour carefully
- Incorporate 3 teaspoons of baking powder
- Mix in 1 tablespoon of sugar
- Sprinkle 1/2 teaspoon of salt
- Whisk dry ingredients until they’re well mixed
For the wet ingredients, get ready 1 large egg and 1 3/4 cups of whole milk Greek yogurt. Gently fold these into your dry mix. The trick to soft rolls is mixing just until combined. Overmixing can result in tough bread.
Here are some tips for mixing quick bread perfectly:
- Stir gently and with a light touch
- Stop mixing when there’s no dry flour left
- Expect a slightly sticky dough
- Avoid stirring too hard
Your dough should look a bit messy but still hold together. If the dough is too sticky, add a little more flour. If it’s too wet, add a bit more flour. You want a dough that’s easy to work with, making soft, fluffy dinner rolls.
Shaping and Preparing Your Rolls for Baking
Making perfect homemade rolls needs careful shaping and prep. Your simple roll recipes will shine with the right techniques. How you shape your dough affects the texture and look of your dinner rolls.
Start by dividing the dough into 12-14 equal pieces. This makes your rolls the same size and bake evenly. Here are some key shaping techniques:
- Round Rolls: Gently cup your hand over the dough piece and roll in a circular motion
- Knotted Rolls: Roll the dough into a rope and tie a simple knot
- Crescent Rolls: Roll out dough into a circle and cut into wedges, then roll from wide end to tip
Spacing Guidelines for Perfect Baking
It’s important to space your dough balls right for perfect baking. Place them about 2 inches apart on a baking sheet. This lets them expand during rising and baking.
Pre-Bake Preparation Tips
Before baking, add these finishing touches to your rolls:
- Brush tops with egg wash for a golden, shiny crust
- Sprinkle with sea salt or herbs for extra flavor
- Let rolls rest and rise for 30-40 minutes before baking
Shaping Variations
| Roll Style | Technique | Difficulty |
|---|---|---|
| Classic Round | Cup and roll dough into smooth ball | Easy |
| Knotted | Create rope, tie into knot | Intermediate |
| Crescent | Cut circle into wedges, roll from wide end | Moderate |
Pro tip: Consistent dough piece size ensures uniform baking and professional-looking homemade rolls.
Baking Temperature and Timing Guidelines

Getting the baking temperature right is key for no yeast dinner rolls. The correct heat makes your rolls golden, soft, and tasty. This is true for baking without yeast.
Here are the exact baking guidelines for perfect results:
- Preheat your oven to 400°F (slightly higher than standard recipes)
- Line a baking sheet with parchment paper
- Space rolls 2 inches apart for even baking
The ideal baking time for your no yeast dinner rolls is 18-20 minutes. Look for these signs to know they’re done:
- The tops should turn a lovely golden brown
- Edges becoming slightly crisp
- Rolls looking puffy and risen
| Baking Parameter | Recommended Setting |
|---|---|
| Oven Temperature | 400°F |
| Baking Time | 18-20 minutes |
| Rolls per Batch | 12-14 |
Pro tip: Every oven is different, so start checking your rolls at the 15-minute mark to prevent overcooking. Use a toothpick inserted in the center to confirm they’re fully baked – it should come out clean.
Getting perfectly baked no yeast dinner rolls is all about precision and observation. Keep an eye on your rolls, trust your instincts, and enjoy the delightful results of your baking adventure!
Tips for Achieving Perfect Texture and Rise
Making delicious yeast-free rolls needs some baking skills. Getting the right texture and rise can be tricky. But with the right techniques, you’ll make easy dinner rolls that wow everyone.
Common Mistakes to Avoid
When baking yeast-free rolls, some mistakes can ruin your results. Here are the main errors to avoid:
- Overmixing the dough can result in tough rolls
- Using expired baking powder
- Incorrect measuring of dry ingredients
- Not preheating the oven completely
Troubleshooting Your No-Yeast Rolls
Having trouble with your easy dinner rolls? Here’s a quick guide to solve common problems:
- Dense Rolls: Likely caused by overworking the dough. Mix until ingredients are just combined.
- Flat Rolls: Check if your baking powder is fresh. Replace if older than 6 months.
- Uneven Rising: Ensure even spacing on the baking sheet and consistent dough ball sizes.
“The secret to perfect yeast-free rolls is gentle handling and fresh ingredients.” – Baking Experts
Pro tip: Always test your baking powder’s freshness by mixing a small amount with hot water. If it bubbles actively, it’s ready to use in your yeast-free rolls.
Storage and Reheating Methods

Keeping your homemade rolls fresh is key. You need to store and reheat them right. This way, they’ll stay as tasty as when you first baked them.
Room Temperature Storage
Here’s how to keep your rolls fresh:
- Keep in an airtight container
- Keep at room temperature
- For best freshness, consume within 3 days
Reheating Options
Here are simple ways to reheat your rolls:
- Oven Method
- Set the oven to 350°F and preheat
- Heat for 5-7 minutes
- Cover with aluminum foil to keep them from drying out
- Microwave Method
- Warm for 10-15 seconds
- Use low power setting
- Set on a paper towel to soak up any moisture
- Air Fryer Option
- Preheat the oven to 350°F
- Warm for 3-5 minutes
- Monitor closely to avoid overcooking
Freezing for Long-Term Storage
Freezing is a great way to keep your rolls fresh longer:
- Let the rolls cool completely
- Store in freezer-safe container
- Freeze for up to 3 months
- Allow to thaw at room temperature before reheating
Tip: For stale rolls, try a light steam bath. It will make them soft and fresh again. Your homemade rolls will almost taste like they’re straight from the oven!
Serving Suggestions and Flavor Variations
Your simple roll recipes are about to get an exciting upgrade! Bread without rising doesn’t mean boring bread. These versatile dinner rolls can make any meal special with just a few creative touches.
Elevate your rolls with these delicious serving and flavor options. They will make your homemade bread shine:
Butter and Topping Inspirations
- Herb-Infused Butter: Mix softened butter with fresh chopped herbs like parsley, chives, or dill
- Garlic Butter: Brush rolls with minced garlic and melted butter before serving
- Honey Butter: Whip butter with local honey for a sweet twist
- Sea Salt Sprinkle: Top with Maldon flake salt for extra crunch
Flavor Variation Techniques
Transform your basic rolls by adding these exciting mix-ins directly into the dough:
- Scallions and Cheddar: Add 1/4 cup chopped scallions and 1/2 cup shredded cheddar
- Rosemary and Sea Salt: Mix in 2 tablespoons fresh chopped rosemary
- Everything Bagel Style: Sprinkle 2 tablespoons everything bagel seasoning on top
Meal Pairing Recommendations
These versatile rolls complement a wide range of dishes. Try serving them alongside:
- Hearty soups and stews
- Roast chicken or pot roast
- Thanksgiving or holiday meals
- Casual weeknight dinners
With these simple roll recipes, you’ll never look at bread without rising the same way again. Experiment, have fun, and enjoy your delicious homemade dinner rolls!
Conclusion
Your journey with no yeast dinner rolls easy recipe has started. These homemade rolls are a quick and tasty solution for busy cooks. They offer fresh, warm bread without the fuss of complex recipes.
With just 30 minutes, you can turn simple ingredients into tasty dinner rolls. This recipe is simple and versatile. It’s perfect for anyone, whether you’re new to baking or a seasoned cook.
Baking is all about practice and passion. Every time you bake these rolls, you’ll get better. Share your creations, try new toppings, and enjoy making delicious bread from scratch.
Try this easy baking method and make these no yeast dinner rolls your favorite quick bread. Your baking adventure begins now – happy baking!
FAQ
Can I make dinner rolls without yeast?
Yes, you can! These no-yeast dinner rolls use baking powder for a quick rise. They’re ready in under 30 minutes, no yeast needed.
What makes these rolls different from traditional yeast rolls?
These rolls are quicker to make than yeast rolls. They use baking powder for a light texture. They’re perfect for those who want fresh bread fast.
Can I substitute ingredients in this recipe?
Yes, you can. Try using whole wheat or gluten-free flour. Swap milk for non-dairy options or use plant-based butter. Remember, changes might affect taste and texture.
What’s the best way to store these dinner rolls?
Store them in an airtight container at room temperature for 1-2 days. Refrigerate for up to 5 days or freeze for a month. Reheat at 350°F for 5-7 minutes to refresh.
What dishes can I pair these rolls with?
These rolls go with many dishes. Enjoy them with soups, stews, or as sandwich bases. Add herbs, cheese, or garlic for extra taste.
Why did my rolls turn out dense or flat?
Overmixing, old baking powder, or wrong measurements can cause this. Mix just until combined and use fresh baking powder for the best results.
Is it possible to prepare these rolls in advance?
While best fresh, you can prep dry ingredients ahead. Mix with wet ingredients just before baking. Shape dough and refrigerate if needed.
Are these rolls beginner-friendly?
Yes! These rolls are great for beginners. They need simple ingredients and no special baking skills. They’re a perfect start for homemade bread.
Have you given our recipe a try?
You must be logged in to submit a review.